Back Up and Restore Your Android Phone with TWRP: When you are rooting, flashing custom ROM and play differently with the Android system, there are many things that can go wrong. Before you begin, you should know how to back up and restore your phone with the TWRP recovery environment.
TWRP makes backups of “Nandroid” which are almost complete image of your system. Instead of using them to restore individual files or apps you are using Nandroid backups to restore your phone exactly the state it was in when you saved: the version of Android, wallpaper, screen home, into which text messages you left unread.
This means that Nandroid backups will not work if you are only trying to restore some elements. If you want to restore your previous ROM applications on your new ROM, for example, you will need to use something like Titanium Backup instead. TWRP is intended to back up and restore the entire system in its entirety.

How to Make a Nandroid Backup in TWRP
Each time you start playing with the Android system rooting, flashing custom ROM and so on, you must first make a Nandroid backup in TWRP. This way, if something goes wrong, you can restore your phone to its pre-broken state.
To do this, boot into TWRP Recovery. Doing this is a little different on each phone-for example, you may have to maintain volume and power buttons simultaneously, then use the volume keys to start “Recovery Mode”. Google instructions for your specific model to see how it’s done.
Once you have done, you will be greeted by the familiar screen in the house of TWRP. Click the Save button.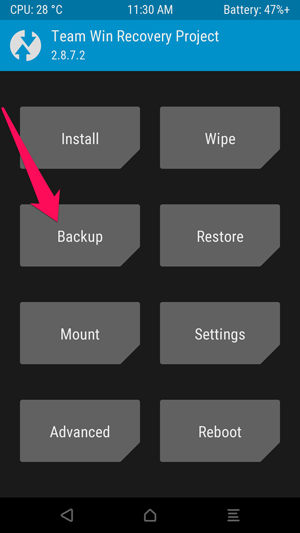
The following screen appears. Press the “Name” bar above to give the backup a recognizable name. I generally use the current date and what I was doing when I backed-like 2016-02-16--pre-root or 2016-02-16--pre-cyanogenmod. Check boot, system, and data boxes, and then drag the bottom bar to save.
NOTE: Backups are quite large, so if you get an error that there is no sufficient space, you may have to remove some things on your storage or internal SD card before proceeding.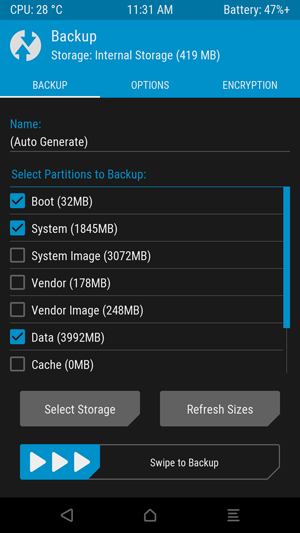 The backup takes a few minutes to complete, so be patient. Once finished, you can press “Back” to return to main TWRP menu or “System Reboot” to reboot back into Android.
If TWRP asks if you want to root your phone, select “Do not install”. It is best to flash the latest SuperSU yourself rather than having TWRP do it for you.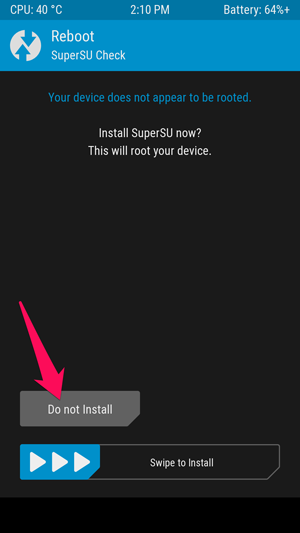
How to Restore from a Nandroid Backup in TWRP
If you need to restore from a previous backup, it is simple. Start this TWRP, and press the “Restore” button on the home screen.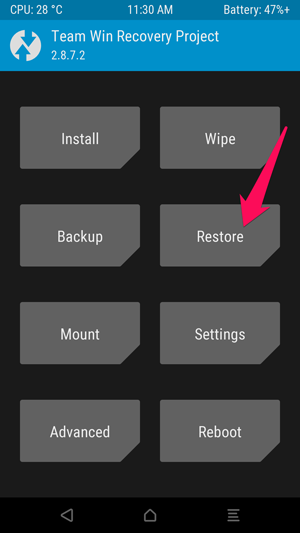 TWRP show you a list of your previous backups. Tap the one you want and you will see the following screen. Make sure all boxes are checked and sliding the bar to restore.
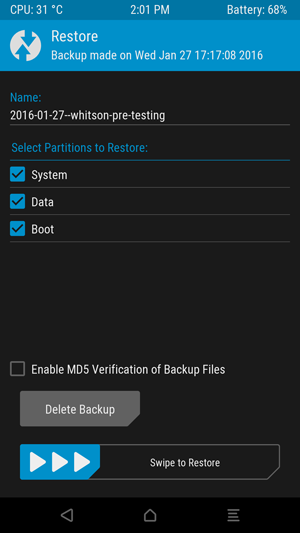 The restoration will take a few minutes, but when it’s finished, you can restart your in Android phone.
Again, if this asks you to root, make sure you press “Do not install”.
When you return to Android, you should find that everything is exactly as you left it when you made the backup.
Nandroid backup is a simple process, but it is critical if you plan to make any change to the system. Always, always, … make a Nandroid backup before doing anything. If something goes wrong, you can always restore without skipping a beat.